
Leads are vital for Businesses and Aweber already proved itself a vital medium to collect leads, recently we ran a split test to find out the best performing lightbox and that triggers us to get this blog post written.
In order to run A/B test in Aweber first off log into your account and then follow the instructions below
Note: To create Split test you must have at least two forms.
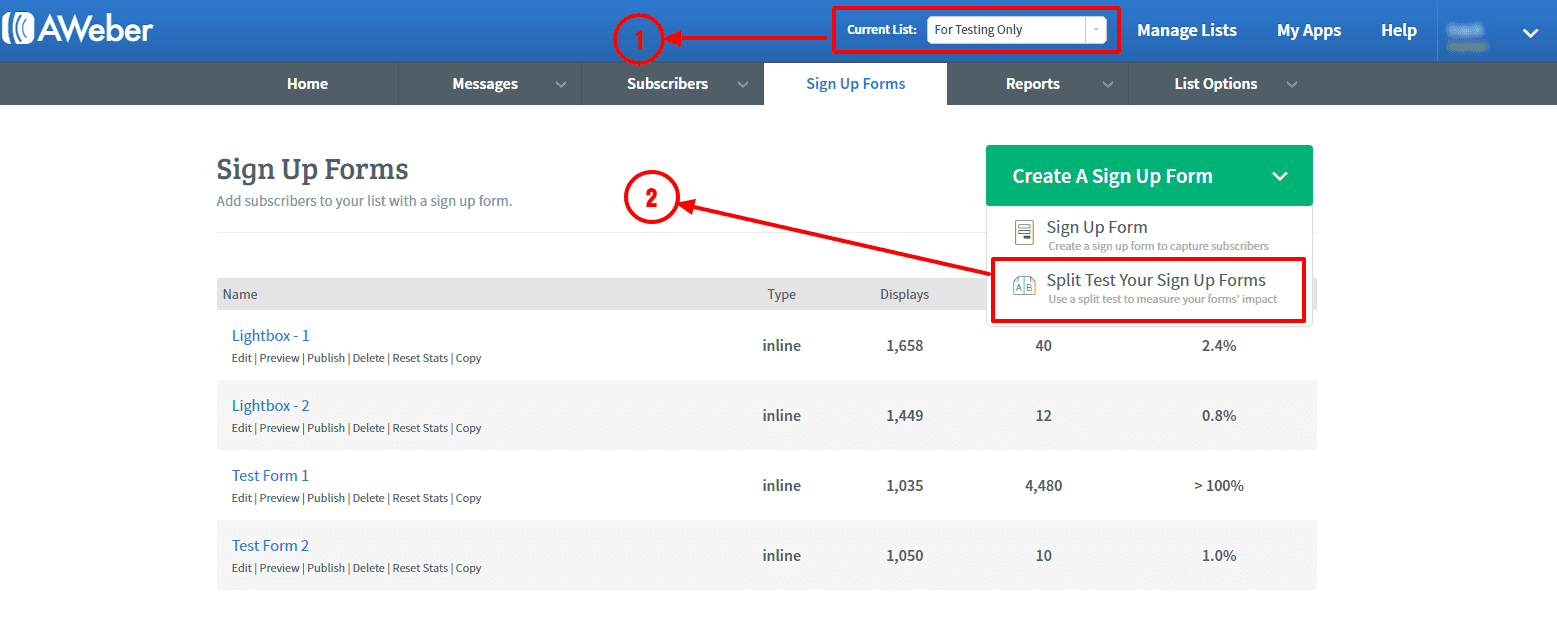
Click on “Sign Up Form” from the “Create A Sign Up From” drop-down to have a form
You will see like this
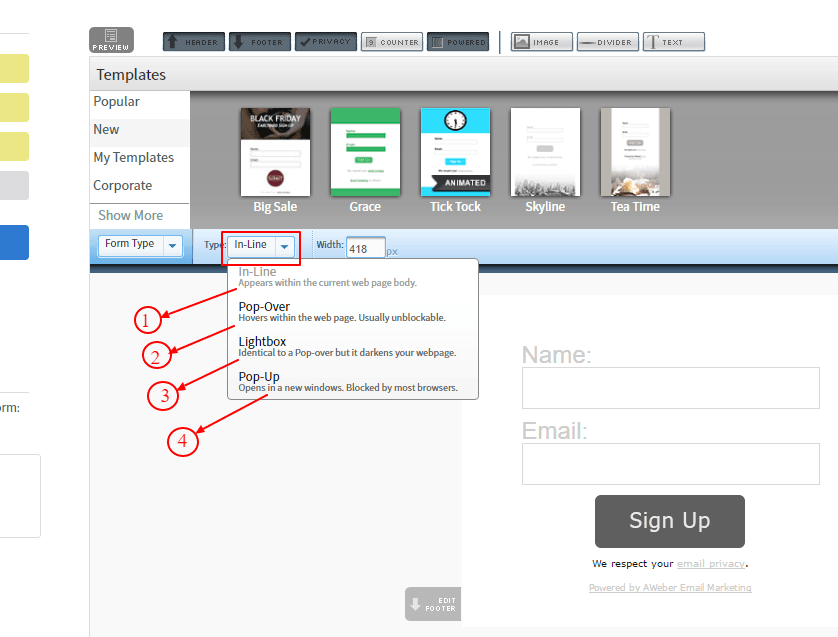
It is important to have a clear sense on the type of form you want to create, there are 4 different kinds
Note: If you want A/B test with Aweber’s built-in lightbox design or default Aweber Popup design then you need to select either “Pop-up” or “Lightbox” and if you want custom popup or lightbox then you must select “In-line“ form.
Configure Split Test from:
You can test multiple forms ( they will automatically rotate ) to find out which one is performing well by defining the percentage of site visitors.
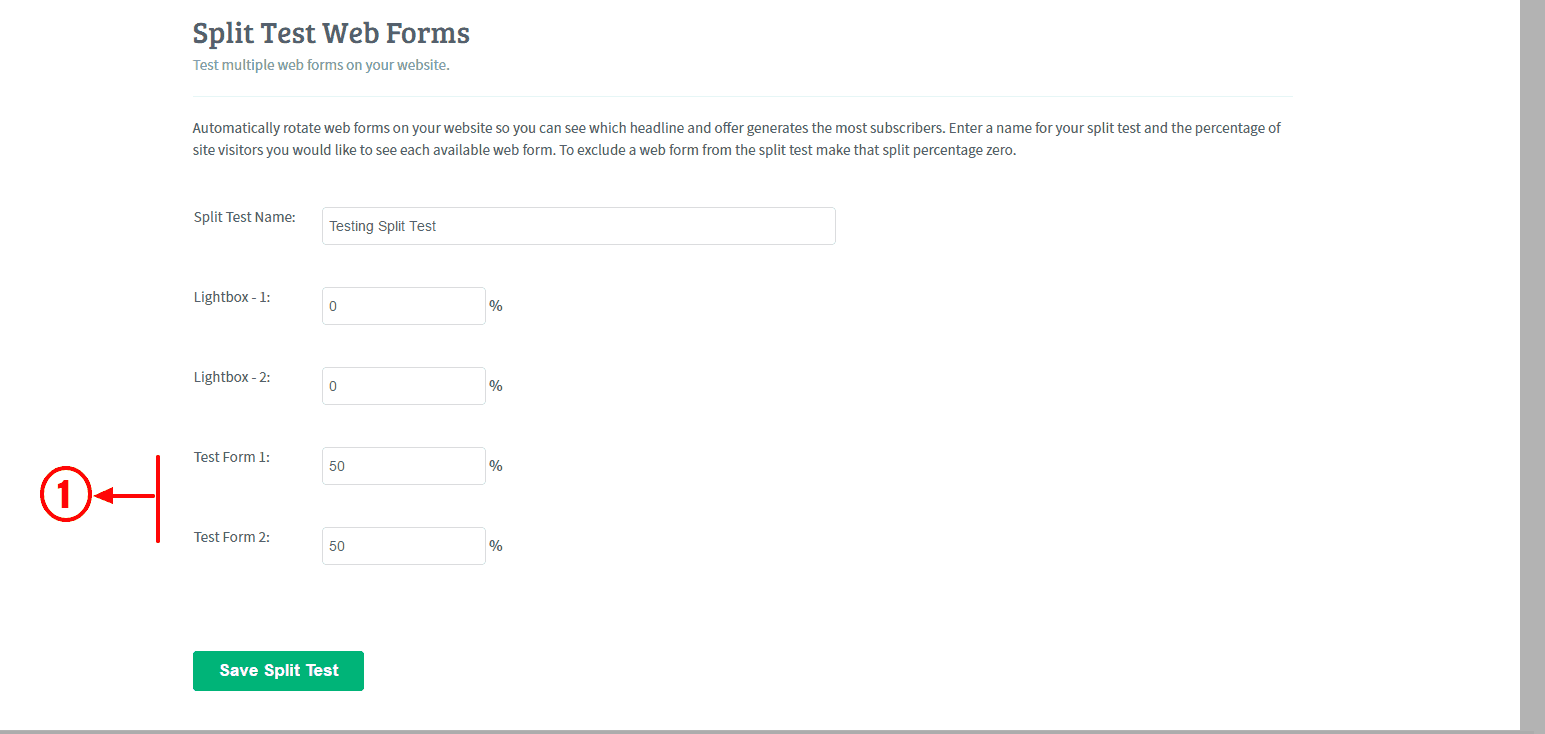
First use a name for your split test and then enter the percentage of site visitors on the forms, here we used “Test Form 1” and “Test Form 2”. And the value 50%/50% means the probability of showing those form in the website.
Then Save the split test and it will look same as the screenshot below
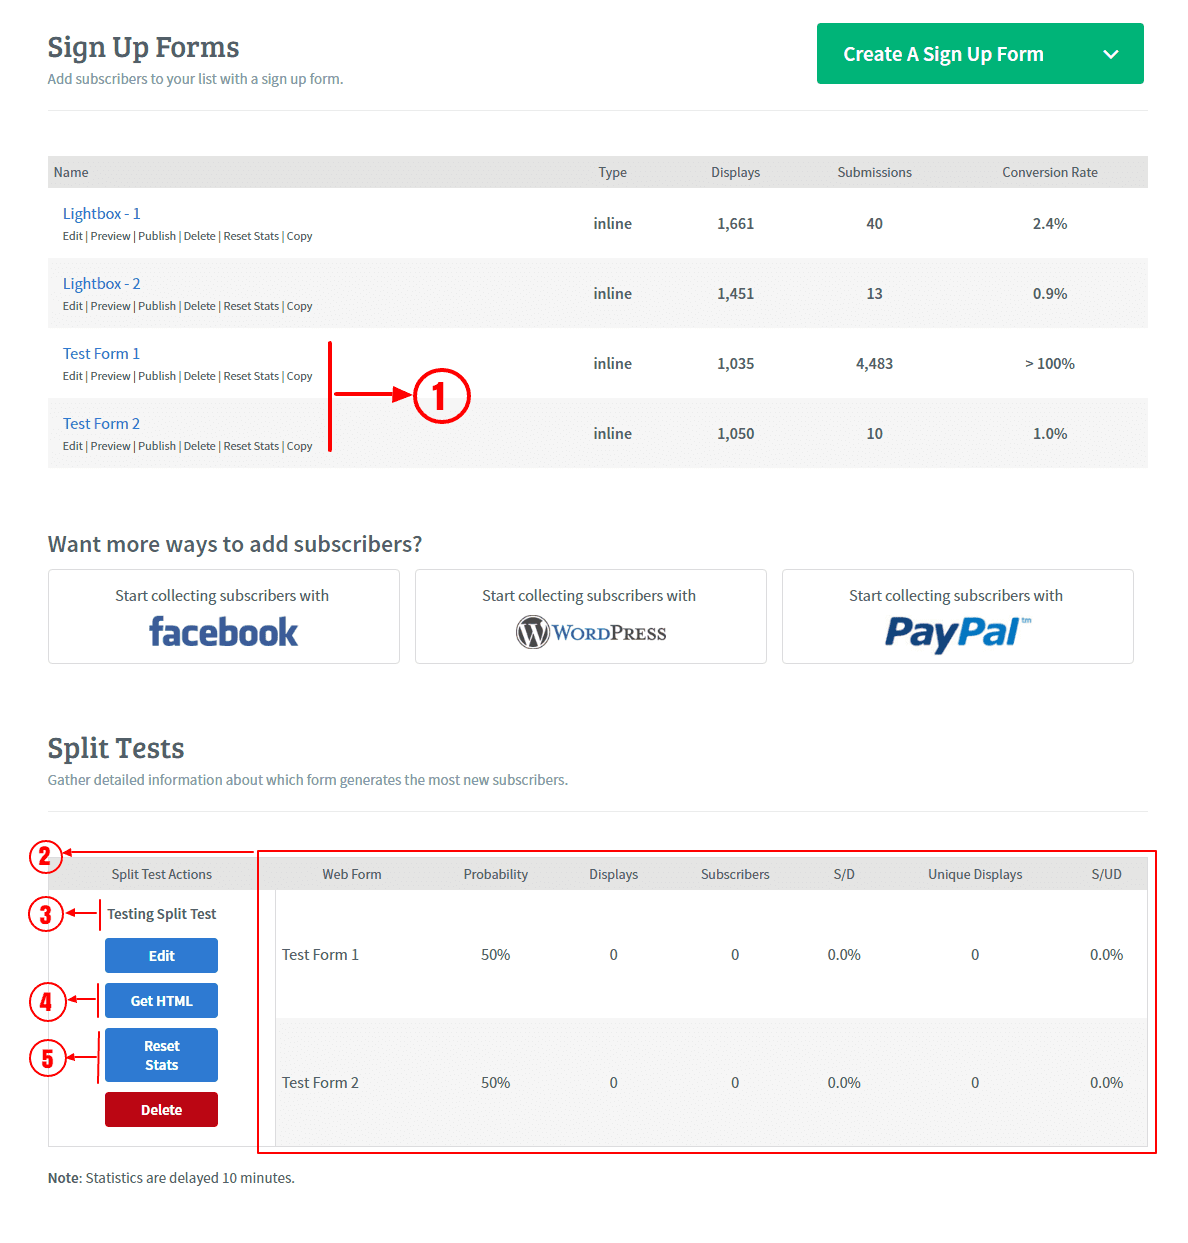
And to understand the screenshot better, please see these points

Aweber Form on your own lightbox :
If you don’t need custom design then just paste the code into your web page aweber will dynamically show the forms. To do this, you must select form type as “Popup” or “Lightbox”
But if you need to use custom designed forms some coding needs to be applied
Why we need custom coding on this ?
To have custom design on this dynamic data you need to write CSS based on Id of the HTML element
Aweber assigned a unique number for each form
var form_identity = jQuery("#aweber-dynamic").find('input[name="meta_web_form_id"]').val();

//And you can check the form by the following code

if(form_identity == '252641984'){
	// this is the form 1

	jQuery('#aweber-dynamic style').remove();

	jQuery("div").remove("#light-box-2-element");

	jQuery("#aweber-dynamic").detach().appendTo('.lightbox-1');

}else{

	// this is for the other form

	jQuery('#aweber-dynamic style').remove();

	jQuery("div").remove("#light-box-1-element");

	jQuery("#aweber-dynamic").detach().appendTo('.lightbox-2');

}
The structure of the HTML will be as follows to show dynamic data
<!-- Lightbox -1 Element -->

<div id="light-box-1-element">

	<!-- End Of Lightbox CSS Code -->

	<div class="lightbox-1">

		<style type="text/css" media="screen">

		/*Style Css*/

		</style>

		<!-- Content goes here -->

	</div>

</div>

<!-- Lightbox -2 Element -->

<div id="light-box-2-element">

	<!-- End Of Lightbox CSS Code -->

	<div class="lightbox-2">

		<style type="text/css" media="screen">

		/*Style Css*/

		</style>

		<!-- Content goes here -->

	</div>

</div>


<div id="aweber-dynamic">
	<script type="text/javascript" src="//forms.aweber.com/form/39/split_970256739.htm"></script>
</div>
Thanks and hopefully you guys will find this post useful, please forward us your questions if you have any, contact us if you need support !
Step into the future with CyberNetikz, where we craft tomorrow’s tech innovations with today’s coding artistry.