

In this blog, I will guide you through the step-by-step process of installing Magento 2.4.5 on your local computer using XAMPP.
I recommend visiting this link before starting the installation to ensure everything goes smoothly:https://experienceleague.adobe.com/en/docs/commerce-operations/installation-guide/overview
Installation Requirements for Magento 2.4.5:
You can visit this link to check all the system requirements.https://experienceleague.adobe.com/en/docs/commerce-operations/installation-guide/system-requirements
Here’s what I’ll be using:
Install and configure XAMPP
Step 1: Download XAMPP
Download link: https://www.apachefriends.org/download.html
We recommend installing XAMPP with PHP version 8.1.25, as this is the version Magento recommends for Magento 2.4.5.
OR
Direct link: https://sourceforge.net/projects/xampp/files/XAMPP%20Windows/8.1.25/xampp-windows-x64-8.1.25-0-VS16-installer.exe
Step 2: Install XAMPP
After downloading XAMPP, double-click on the file to install it on your computer.
Step 3: Configure XAMPP
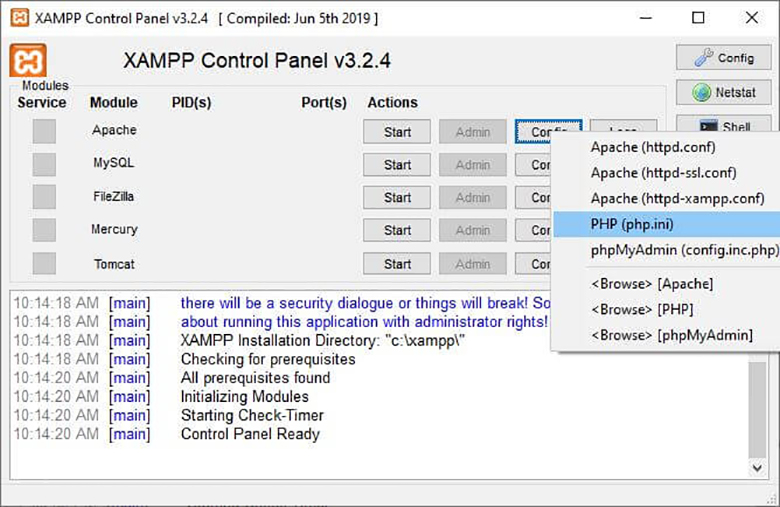
In the XAMPP Control Panel, click Config button on “Apache” row, and click “PHP (php.ini)“.
 In the php.ini file, find these rows and remove; before each row:
Enable “intl“, “xsl“, “soap“, “gd”, “sodium”, “zip”, and “sockets” extensions in the configuration file by searching for the extensions by pressing ‘ctrl+f’ as shown in the below images. Then remove the semicolon to uncomment it before the line.


Now Save and close the file at last. Stop and restart the Apache.
Note: Most PHP extensions are enabled by default. If you face any issues, review them one by one, make the necessary changes, then save the file and restart the server.
Configure php settings:
In php.ini file, search and change the following values as below:
max_execution_time=18000
max_input_time=1800
memory_limit=2G
Now Save and close the file at last. Stop and restart the Apache.
Step 4: Configure hosts file
Open C:\Windows\System32\drivers\etc\hosts. You can open this file click after right button and select as Run as Administrator. Add the following line to the last row:
127.0.0.1 www.localhost.com
Step 5: Create a database
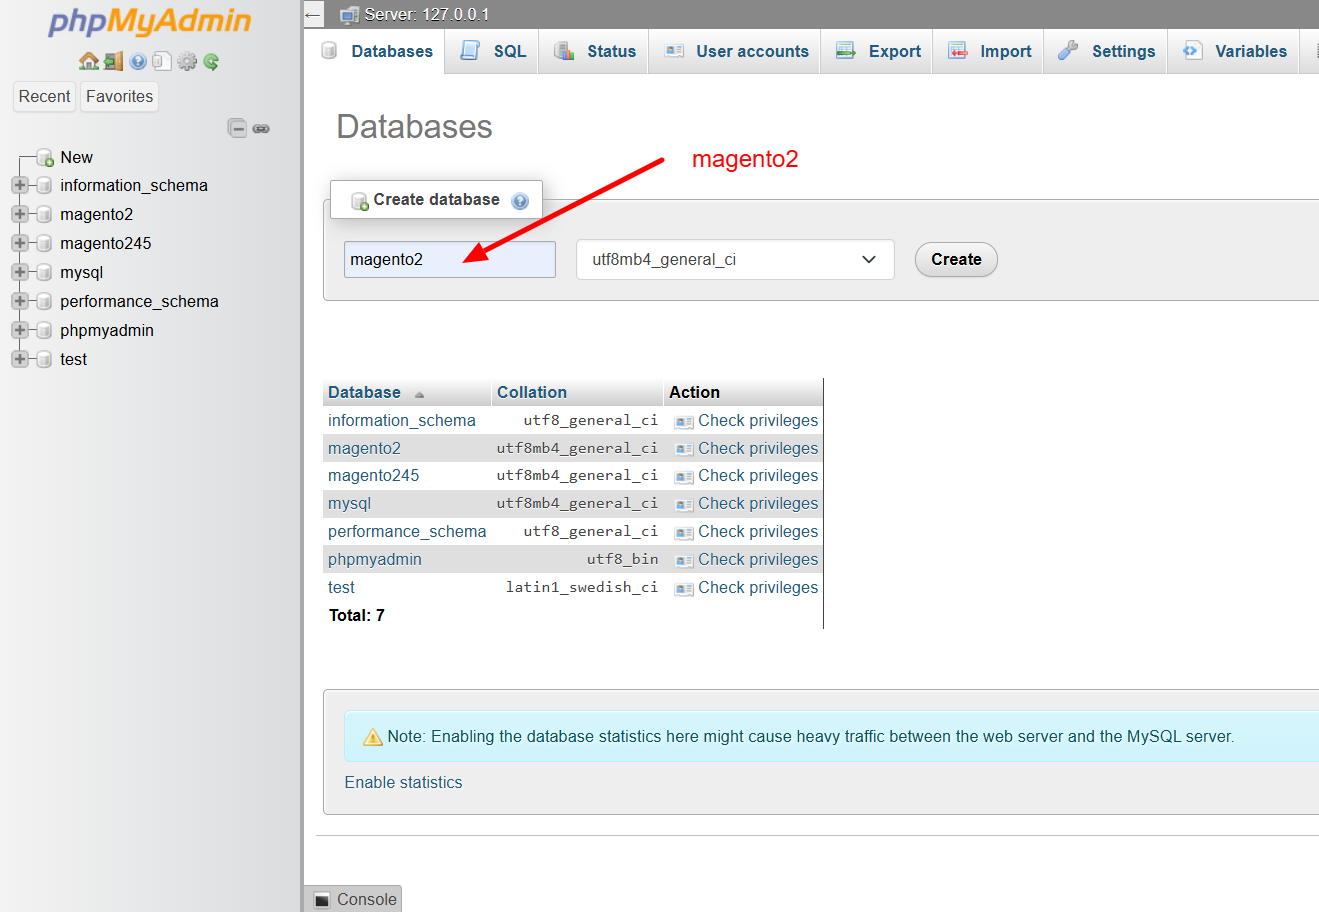
For Magento2, we have to create a database. Firstly, open the web browser and hit the URL “http://localhost/phpmyadmin” to open the phpMyAdmin page. Then, by using the “new” button in the menu section on the left, create a database by the name “magento2” or by another name of your choice.
Part 2: Install Elasticsearch
Download Elasticsearch from this link: https://www.elastic.co/downloads/past-releases/elasticsearch-7-17-0 and install it.
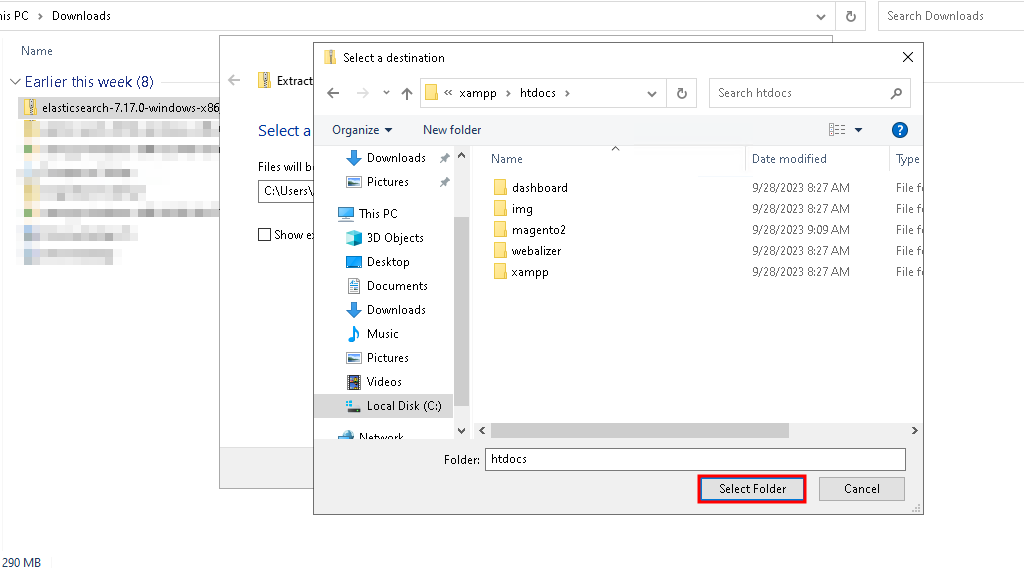
Extract the Zip file in the htdocs folder of the XAMPP installation directory after it has been downloaded. To do that, right-click the elasticsearch zip file and select extract files, and then select the htdocs destination path and press ‘Select’.
 After successful extraction, run the bash file as an administrator.
 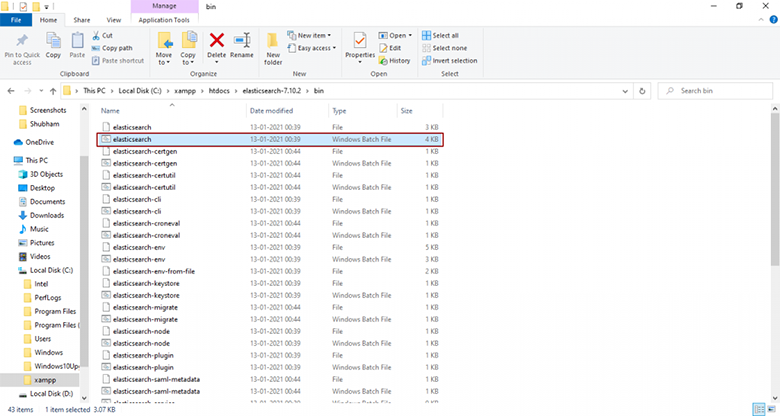 You will get the output below.
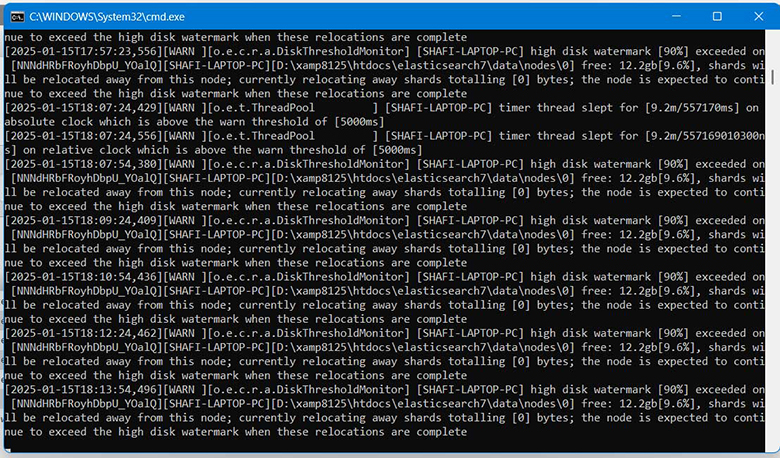 ***Note: Please don’t close this window until the completion of the Magento 2.4 installation. Otherwise, it will show up an error.
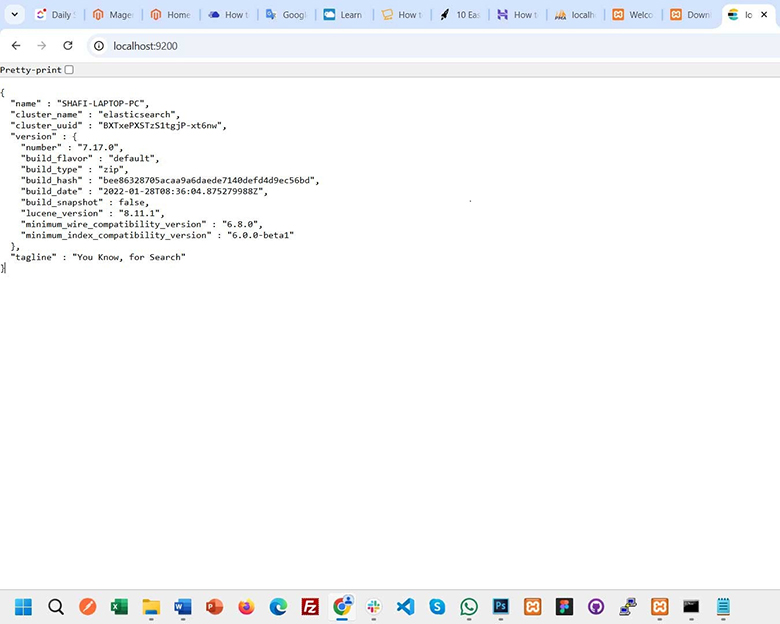
Please wait for a while to get the installation done. Then type “localhost:9200” in the browser and you’ll get details of the installed Elasticsearch extension.
The output will be identical as seen in the image below:
Install Composer for Magento
You need to install the Composer latest version download and run Composer-Setup.exe. This will install the latest version and set up your path to “call” Composer from any directory.
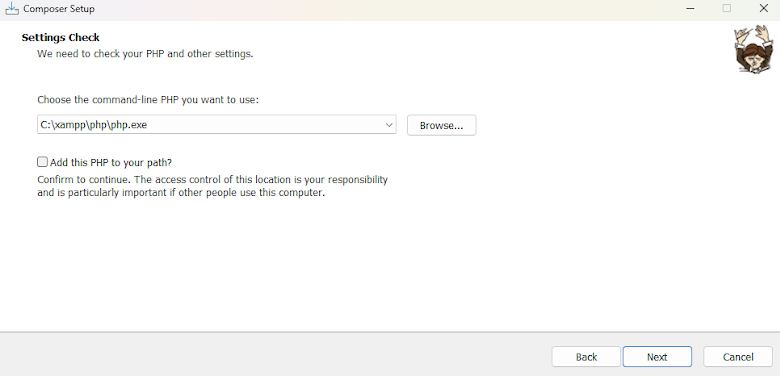
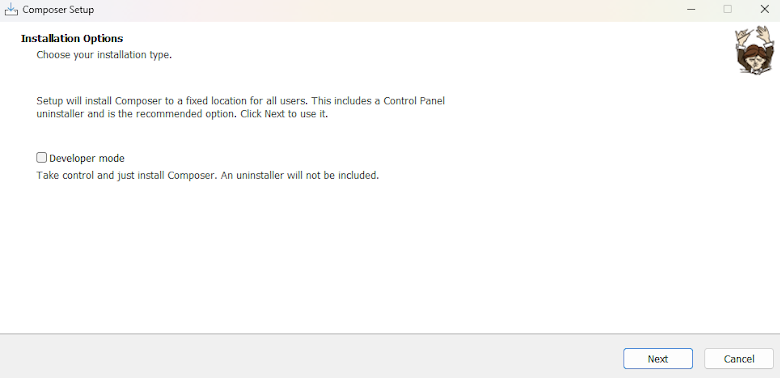 Click the Next button and browse the PHP path in the XAMPP folder.
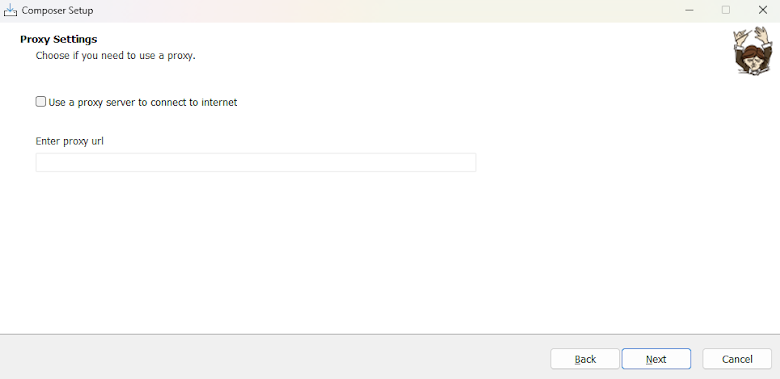
 It’s optional to enter your proxy URL.
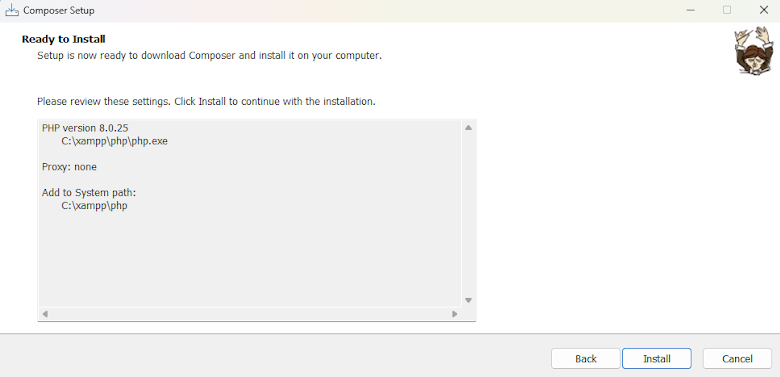
 Now click the Install button to initiate the final step.
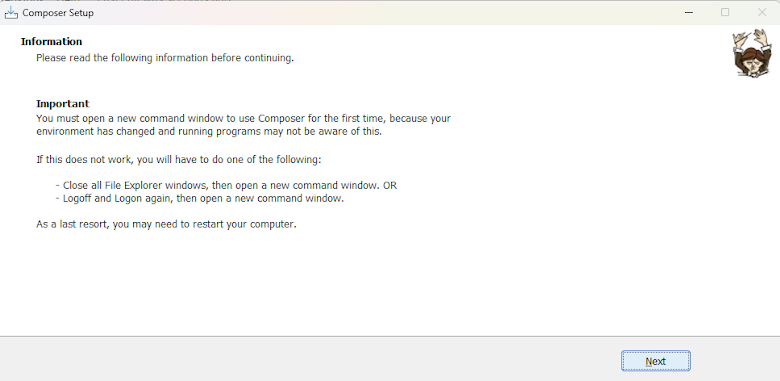
 Click the Next button.
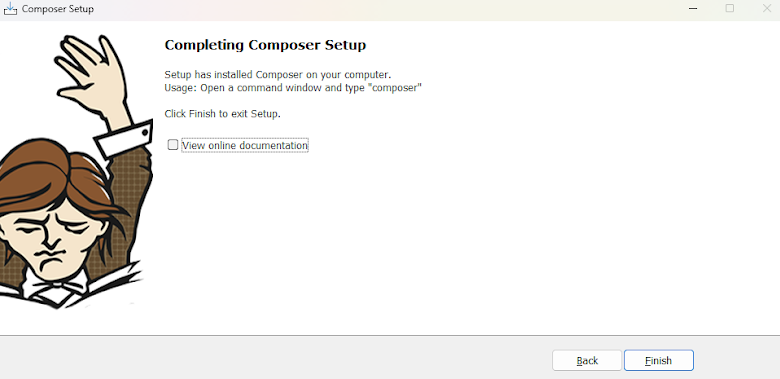
 Click the Finish button.
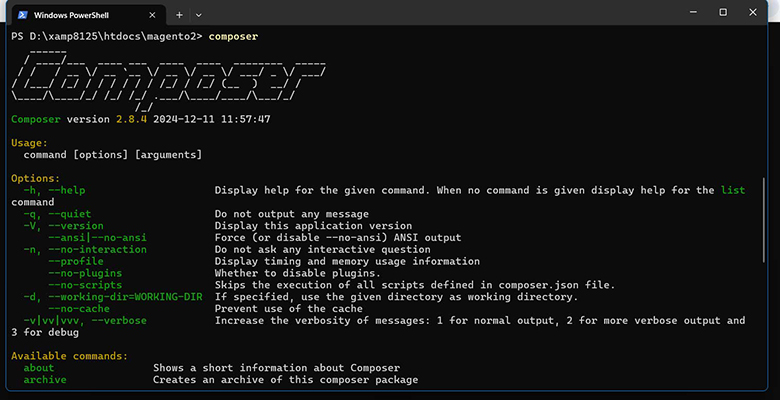
 Launch the Command Prompt and run the Composer command to verify that it has been installed without any issues.
Run composer
 Or
Or
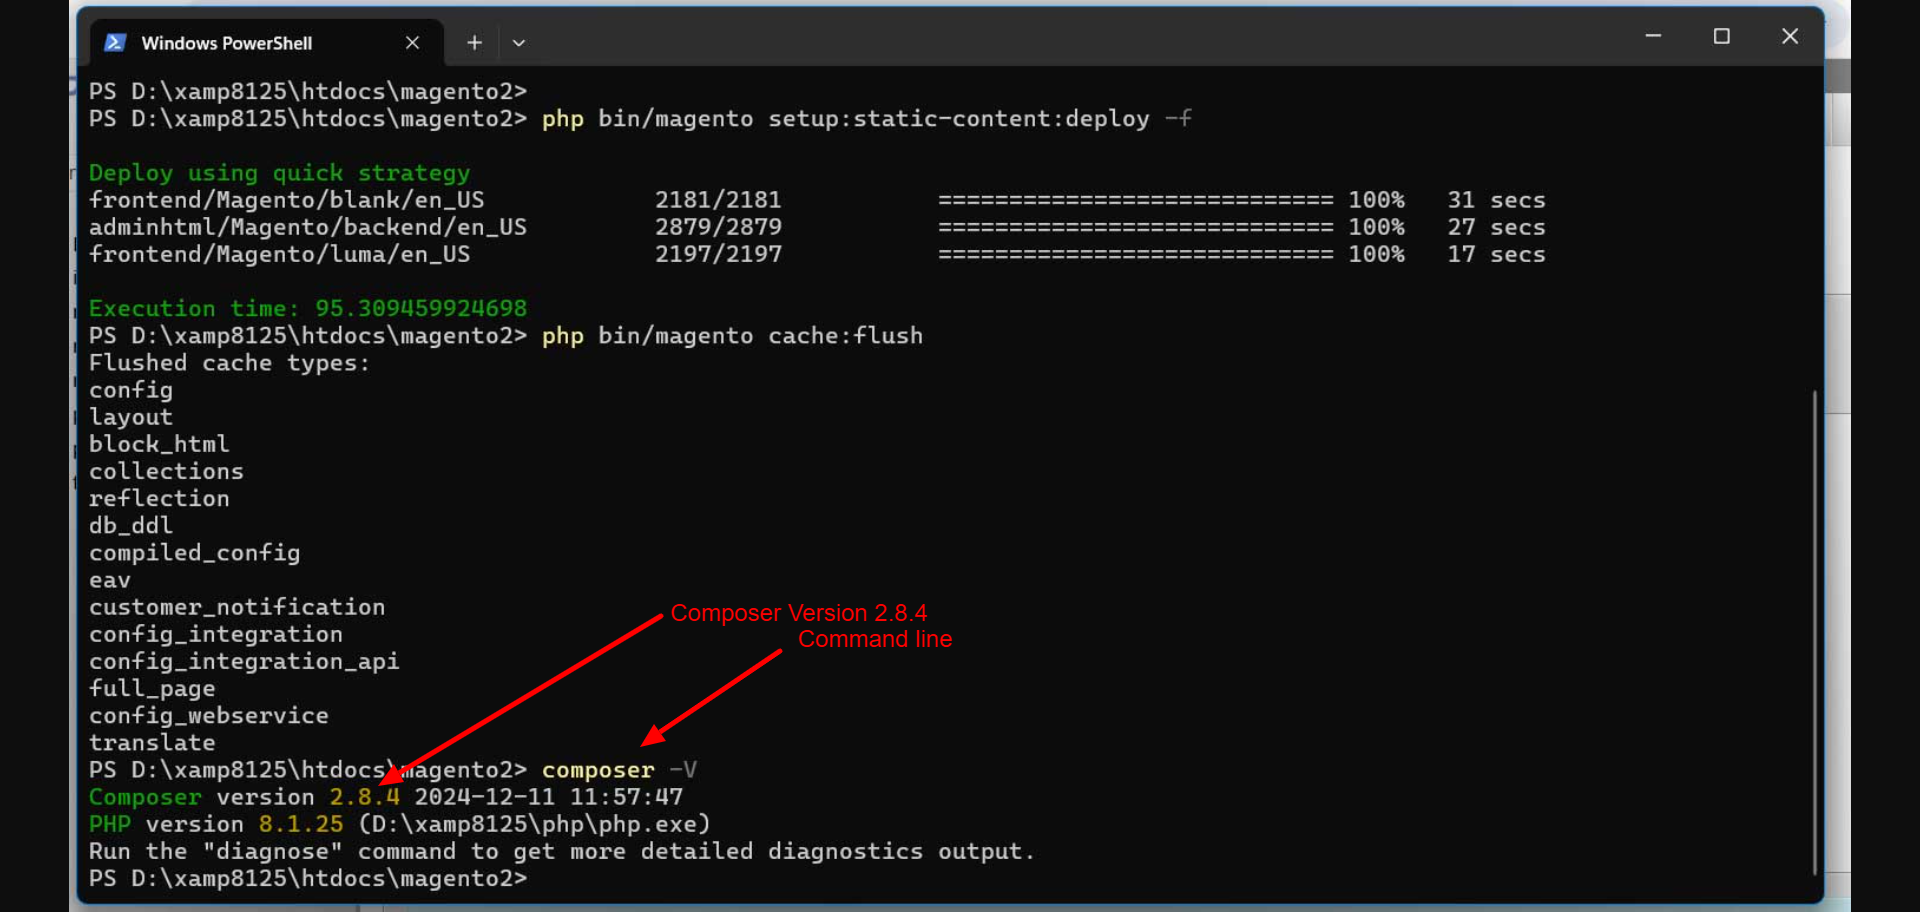
Run composer -V
 Part 3: Download Magento using Composer
After install composer and then go to the XAMP folder and then go to the htdocs folder ( D:\xampp8125\htdocs ) and run the following command:
Magento Open Source:
composer create-project —repository-url=https://repo.magento.com/ magento/project-community-edition=2.4.5 <install-directory-name>
Just change <install-directory-name> to magento2(As your wish project name)
For example: composer create-project —repository-url=https://repo.magento.com/ magento/project-community-edition=2.4.5 magento2
Adobe Commerce (Enterprise):
composer create-project –repository-url=https://repo.magento.com/magento/project-enterprise-edition:2.4.5
Note: Enterprise edition is paid. Since we want to learn and so now skip it and run community edition and then see the image below:
Next, enter your Magento authentication keys. Public and Private Keys are created and configured in your Magento marketplace account.
Navigate to the Account name in the top right of the page and select My Profile.

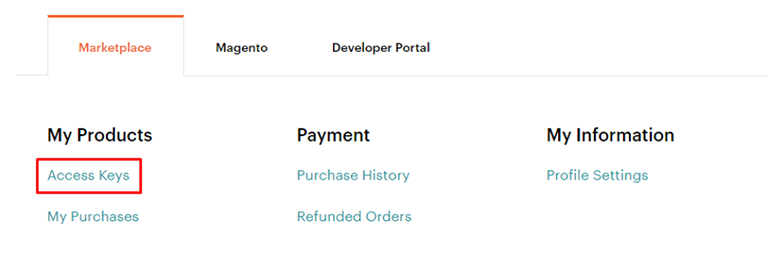 Next, click on the Access keys from the Marketplace tab.
 Click Create a New Access Key. Enter a specific name for the keys (for example, the name of the developer receiving the keys) and click OK.
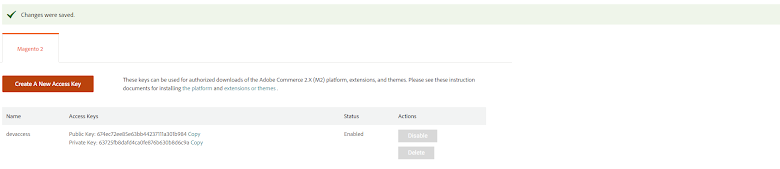 Copy the Public Key in the username and the Private Key in the password to install Magento.
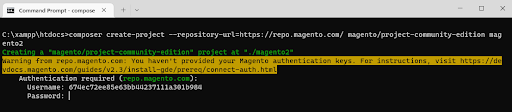
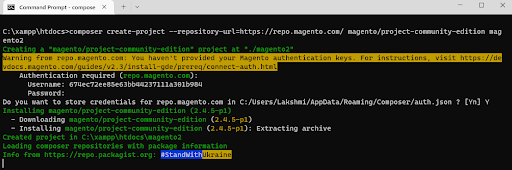 It should take a while for the composer to download and install all the necessary modules. When everything is finished, this is what you should see:
 During Magento 2.4 installation, you may encounter some errors. To prevent such errors, you first need to make some tweaks to Magento files.
To prevent this error:
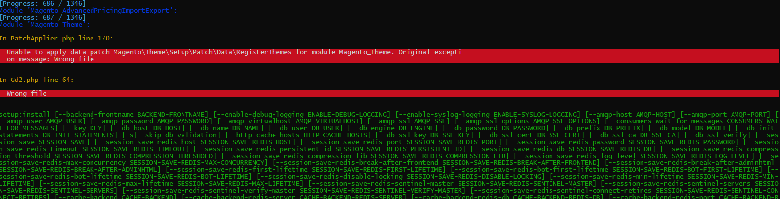
Go to the project folder and then go to this open directory path and file this type \vendor\magento\framework\Image\Adapter\Gd2.php and replace it with:
private function validateURLScheme(string $filename) : bool { $allowed_schemes = [‘ftp’, ‘ftps’, ‘http’, ‘https’];
$url = parse_url($filename);
if ($url && isset($url[‘scheme’]) && !in_array($url[‘scheme’], $allowed_schemes) && !file_exists($filename)) {
return false;
}
return true;
}
Next, go to the project folder (Suppose: ‘magento2’) or you can change directory path cd to your Magento directory and run this command:
For example: cd magento2
And then see below:
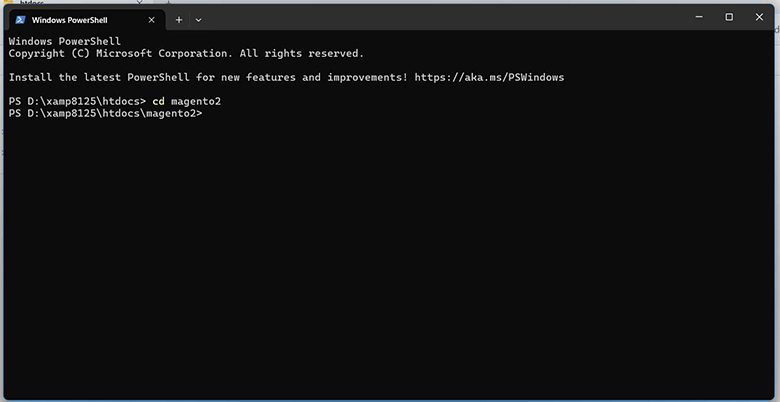 Open the command prompt window. Next, cd to your Magento directory and execute the command:
php bin/magento setup:install –base-url=”http://localhost/magento2/” –db-host=”localhost” –db-name=”dbmagento2″ –db-user=”root” –admin-firstname=”admin” –admin-lastname=”admin” –admin-email=”[email protected]” –admin-user=”admin” –admin-password=”admin123″ –language=”en_US” –currency=”USD” –timezone=”America/Chicago” –use-rewrites=”1″ –backend-frontname=”admin” –search-engine=elasticsearch7 –elasticsearch-host=”localhost” –elasticsearch-port=9200
Please note: Assign the base URL per your path, note down the admin username and password, and do not use the Elasticsearch port.
Replace these values:
Other values are optional, we can change them later.
Now, if everything is done properly, Composer 2 will start to install Magento 2. The process will last for around 10 minutes.
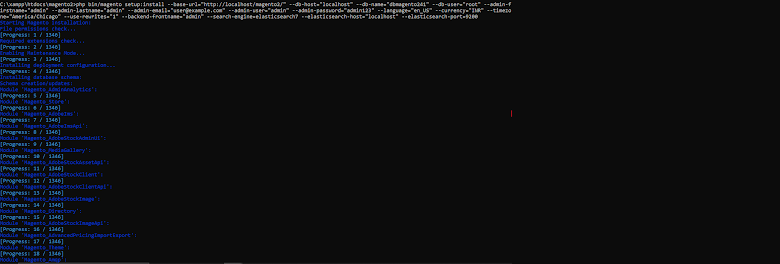 Be patient, as it could take some time to install all instances and required modules to set up Magento 2.4.5.
After the installation, you will end up with these results. 
After this, we’ll have to make some additional tweaks in order to make Magento work with Windows, like so:
Open this directory path and file.
In app\etc\di.xml, replace Symlink with Copy
<virtualType name=”developerMaterialization” type=”Magento\Framework\App\View\Asset\MaterializationStrategy\Factory”>
<arguments>
<argument name=”strategiesList” xsi:type=”array”>
<item name=”view_preprocessed” xsi:type=”object”>Magento\Framework\App\View\Asset\MaterializationStrategy\Symlink</item>
<item name=”default” xsi:type=”object”>Magento\Framework\App\View\Asset\MaterializationStrategy\Copy</item>
</argument>
</arguments>
</virtualType>
And then open this directory path.
In vendor\magento\framework\View\Element\Template\File\Validator.php, replace line 138 with:
$realPath = str_replace(‘\\’, ‘/’,$this->fileDriver->getRealPath($path));
Finally, run these commands:
php bin/magento indexer:reindex
php bin/magento setup:upgrade
php bin/magento setup:static-content:deploy -f
php bin/magento cache:flush
Now hit the URL (usually localhost/magento2/pub/) or the base URL you set earlier for the in base-url during the installation.
For Admin: Access the url with http://localhost/magento2/pub/admin.
Note: If your above the URL is not working, then you follow the below:
Additional tweaks for Magento 2.4.5 and above:
Starting from Magento 2.4.5, it’s now mandatory to serve content from from the /pub/ folder in order to ensure better security. This is why additional tweaks are required in order to make your Magento 2.4.5 version work properly.
Step 1: Copy the index.php and .htaccess files from /pub/ to your root folder.
Step 2: Find the below line in the index.php (in the root folder):
require __DIR__ . ‘/../app/bootstrap.php’;
and replace it with
require __DIR__ . ‘/app/bootstrap.php’;
Step 3: Go to the Magento 2 database which you recently created (in http://localhost/phpmyadmin) and find the table core_config_data using this SQL query:
SELECT * FROM core_config_data
In this table, you’ll want to insert these rows in:
| Path | Value |
| web/secure/base_static_url | http://localhost/magento2/pub/static/ |
| web/unsecure/base_static_url | http://localhost/magento2/pub/static/ |
| web/secure/base_media_url | http://localhost/magento2/pub/media/ |
| web/unsecure/base_media_url | http://localhost/magento2/pub/media/ |
Replace magento2 with your Magento install directory
Insert rows manually: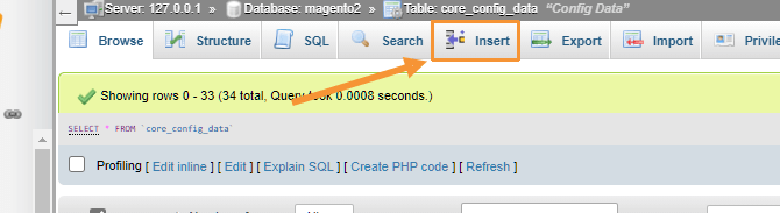
Insert rows with SQL queries:
· INSERT INTO `core_config_data` (`config_id`, `scope`, `scope_id`, `path`, `value`, `updated_at`) VALUES (NULL, ‘default’, ‘0’, ‘web/secure/base_static_url’, ‘http://localhost/magento2/pub/static/’, current_timestamp());· INSERT INTO `core_config_data` (`config_id`, `scope`, `scope_id`, `path`, `value`, `updated_at`) VALUES (NULL, ‘default’, ‘0’, ‘web/unsecure/base_static_url’, ‘http://localhost/magento2/pub/static/’, current_timestamp());· INSERT INTO `core_config_data` (`config_id`, `scope`, `scope_id`, `path`, `value`, `updated_at`) VALUES (NULL, ‘default’, ‘0’, ‘web/secure/base_media_url’, ‘http://localhost/magento2/pub/media/’, current_timestamp());· INSERT INTO `core_config_data` (`config_id`, `scope`, `scope_id`, `path`, `value`, `updated_at`) VALUES (NULL, ‘default’, ‘0’, ‘web/unsecure/base_media_url’, ‘http://localhost/magento2/pub/media/’, current_timestamp());
Your newly added rows should look something like this:

Now clear cache using:
php bin/magento cache:flush
Now you can access your Magento frontend with your configured base-url. And refresh your frontend. You should now be able to see a blank page like this when access your frontend via configured base-url:
New base-URL: http://localhost/magento2/
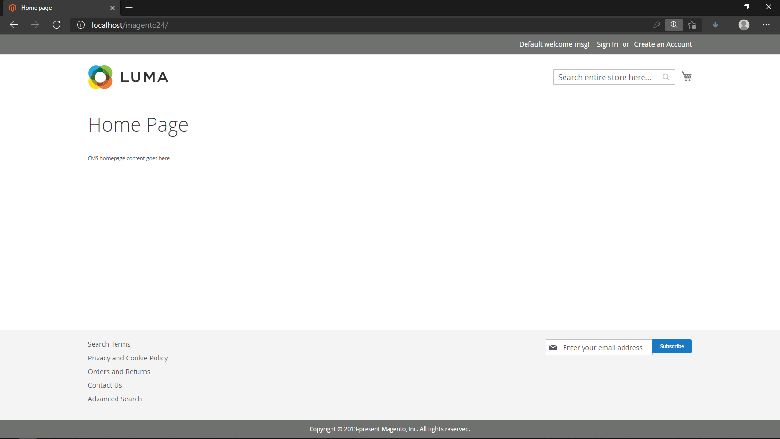
And our backend URL: http://localhost/magento2/admin
*Note: if you face this error when trying to log into your Magento Admin account: “You need to configure Two Factor Authorization…”
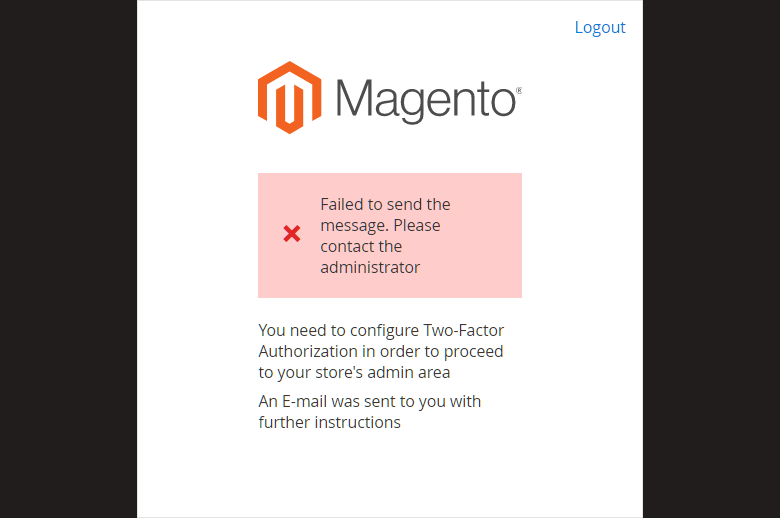
Try running this command:
php bin/magento module:disable Magento_TwoFactorAuth
And then this error will be finish.
Part 5: Import sample data (optional)
Run this command to import sample data:
php bin/magento sampledata:deploy
After running this command, if you encounter any errors, go to your project’s root folder (magento2). There you’ll find a file named auth.json.sample. Rename it to auth.json, and then paste your Magento public and private authentication keys into this file.
Then again, this command to import sample data:
php bin/magento sampledata:deploy
After importing data is complete, run:
php bin/magento setup:upgrade
php bin/magento setup:static-content:deploy -f
php bin/magento cache:clean
Now refresh the frontend, and you should see the default Magento store with the Luma theme and sample data.

That’s it! I hope you’ve successfully installed Magento 2 on your localhost. You can now access both the frontend and backend URLs. Enjoy your Magento setup!
Step into the future with CyberNetikz, where we craft tomorrow’s tech innovations with today’s coding artistry.